

In the ever-evolving landscape of cloud computing, security remains an utmost concern. As the top 1 cloud provider, organizations increasingly rely on AWS to power their digital infrastructure. While it’s true using AWS an organization can optimize its digital infrastructure and make more profit. But the same thing can become disastrous if the security is not maintained properly.
AWS manages the security of the Cloud. That includes data centers, servers, the service gateway such AWS website, and AWS CLI, etc. as it’s their part of responsibility. But this doesn’t free the cloud customer from the security responsibility.

Source: AWS Shared Responsibility Model
This AWS shared responsibility model defines that the cloud customers have to secure the resources that they put on the cloud. That includes encryptions, access control, firewalls, and more. But there’s no need to worry because AWS already has everything planned, all you have to do is implement these security solutions and follow the best practices to protect your cloud infrastructure from potential security risks.
And the core of this security solution is using AWS IAM service (free).
What is AWS IAM
AWS Identity and Access Management (IAM) is the service developed to manage access control of the resources that you put in or use from AWS. In simple terms it allows you to decide who can control your EC2 instance, who can terminate an instance, who is allowed to upload new files in your S3 buckets, and much more.
Understanding AWS IAM
The core components AWS IAM uses to maintain its access control are the Users, Groups, and Roles. With each of them developed for a different situation in mind. Using these three or combined you can manage almost all kinds of access management you can think of to your AWS resources.
1. Users
They are the individual user who follows a similar process as the root account (your default account). They contain a username and password and a unique AWS ID that defines which root account the IAM users belong to. This only allows your specified user to log in. If some other IAM user has the same credentials they won’t be able to log in unless they know your unique AWS ID.
You can assign different sets of permissions (aka policy) to these accounts allowing you to give them complete admin access or just a specific service access like EC2. This way you can only permit your employees to perform their tasks not more not less. For example, a developer working with an EC2 instance doesn’t require to see the billing section or other AWS services. You can just specify the policy that will only allow that user to do that task. This permission can also allow applications to access your AWS resources not just the humans.
2. Groups
While the user is good for a small number of usage. But when you have enterprise infrastructure with 100+ of employees and different services requiring a set of permissions. And also their timeline of account access may differ. While it’s okay to directly embed permission to users where you don’t have many users. But when you do this with a large quantity it becomes hectic to create, set, and maintain all these permissions. Which ultimately leads to account compromise, permission misuse, and other security problems.
This is where AWS IAM groups solve the problem. Instead of creating individual users and adding permission to them. You create an IAM group and specify the permissions for that group. Later you just create the IAM users and add the users to the group. And the users will automatically get all the access the group has. This way when permission is no longer needed you can just remove that user from that group, and also assign the user to another group if needed a different permissions. This significantly reduces the margin of errors and misconfiguration in IAM.
3. Roles
IAM Roles, on the other hand, are not associated with specific users but are designed for AWS resources or services. Role defines what action AWS resources can perform and who (or what) can assume the role. While IAM users are used for long-term access to specific AWS resources IAM Roles only allows temporary access to the resources.
An example is an EC2 instance that runs a web application that accesses and stores files in S3 buckets. Instead of storing sensitive credentials on the EC2 instance you can create an IAM role and assign that role to your EC2 instance. It will give the EC2 instance to temporarily access the S3 buckets with unique security tokens. These tokens automatically expire in a fixed time from a maximum of 12 hours. You can also use IAM roles for tasks that take longer than that. In this case, the security token will be refreshed with a new one.
IAM roles can also be used to grant cross-account access that allows one AWS resource to be accessed with a different AWS account. See the official doc to learn more.
IAM Policies
AWS IAM Policies are the documents or config files that define the permissions granted to users, groups, or roles to access AWS resources. These policies are at the core of controlling who can do what within your AWS environment.
These policies are defined using a JSON document that outlines the permission and access controls. It specifies which actions are allowed or denied on which AWS resources. You can either add predefined policies or create your policies and add them to the users, groups, or roles. Once defined the user, groups, or roles can access the specified services with specified permissions.

Creating IAM account
To create an IAM user account you first need the root account or another IAM account with permission to create new users. Following the first option, log in to your AWS root account.
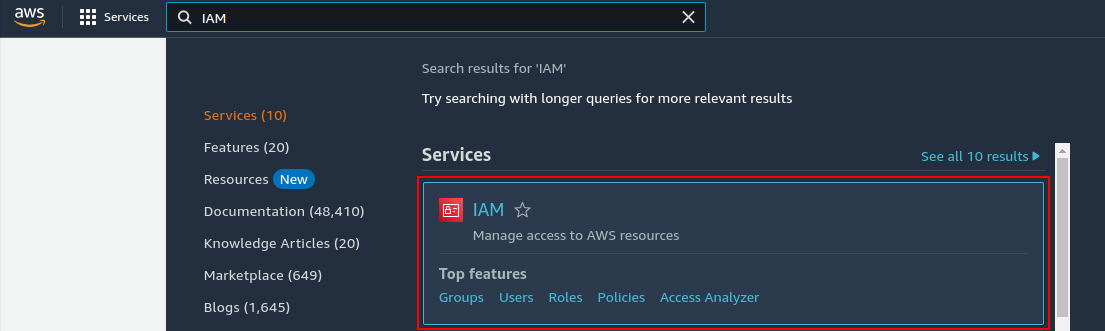
Once you are logged in, search for IAM in the search bar and select the “IAM” service.
This will take you to the IAM dashboard. Let’s look at the dashboard elements.

First, on the left side, we have the menu bar to create users, groups, roles, and other necessary links (1). The security recommendations (2) will show some security problems that are detected automatically by AWS, e.g. MFA alert as shown. The “IAM resources” (3) will show the available users, groups, roles, policies, and identity providers. On the right side (4) we have the account sign-in URL and account ID.
The dashboard also contains some other documents that are helpful to implement IAM.
Now click the “Users” link from the menu bar.

This will show you all the available users. By default, there won’t be any users. Click on “Create user” to create a new user.

It will take you to the user setup page. Enter a username following the rule specified.

Select the tick mark, and select “I want to create an IAM user”.

Keep everything else default and click “Next”.
This will take you to step 2 where you will have to set up permissions options.

It has 3 options to select from. “Add user to group” will add the permission to the group and later add the user to the group. You can create a new group or add an existing one.
“Copy permissions” will allow you to copy an existing user’s permission.
“Attach policies directly” will allow you to directly add policies to that user. This approach is not recommended and only should be used in case of absolute need.
Select the first option as it’s recommended best security practice. But first, you will have to create a group. If you already have one created you can also see it there.

The “Create group” will pop up in a window. Select a name following the rules specified.

Then you will have to select the policy you want the users of the groups to inherit. AWS provides 884 pre-written policies as of writing this article. Alternatively, you can create your custom policy.
We are going to create an administrator replica, so we will select the “AdministratorAccess” (first) policy.

You can click on the “+” icon to see the json code of the policy. You will also be able to see the total number of policies selected at the top.
Once you have selected the proper policies, click “Create user group”. This will create the group and you will be able to see the group name, attached policies, and other info.

You can create another group if you want. Once done, select the group you want and click “Next”.
The “Set permissions boundary is optional” and we won’t be needing this for the demo.
Once you hit “Next” this will take you to the review page. Check the group name and permissions you attached. You can also add tags to better identify the users.
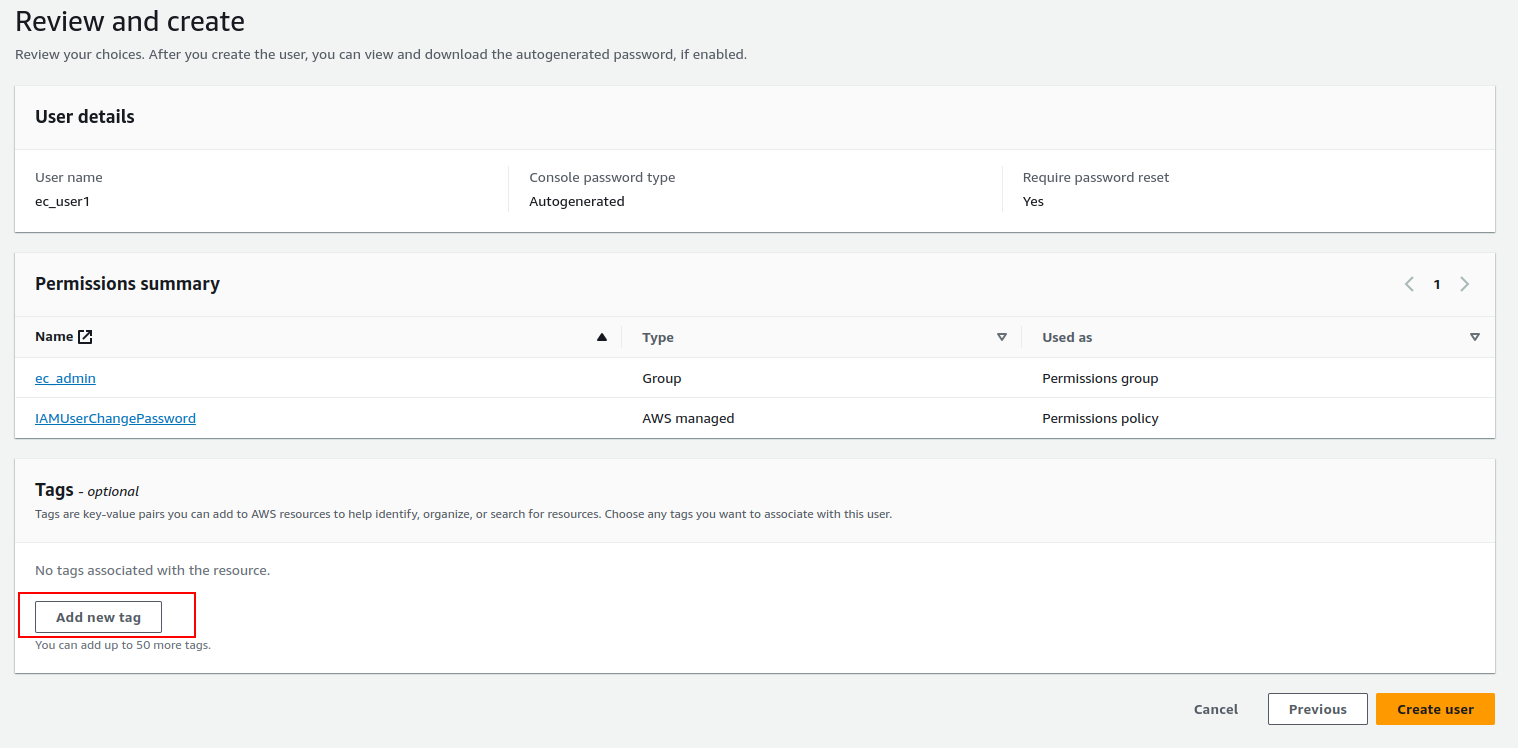
Tags can be really useful to organize the users.

Once you are done with the tags, click “Create user”. This will create the user and also give you the login credentials. You can email the sign-in instructions, download a CSV file, or just copy and paste.
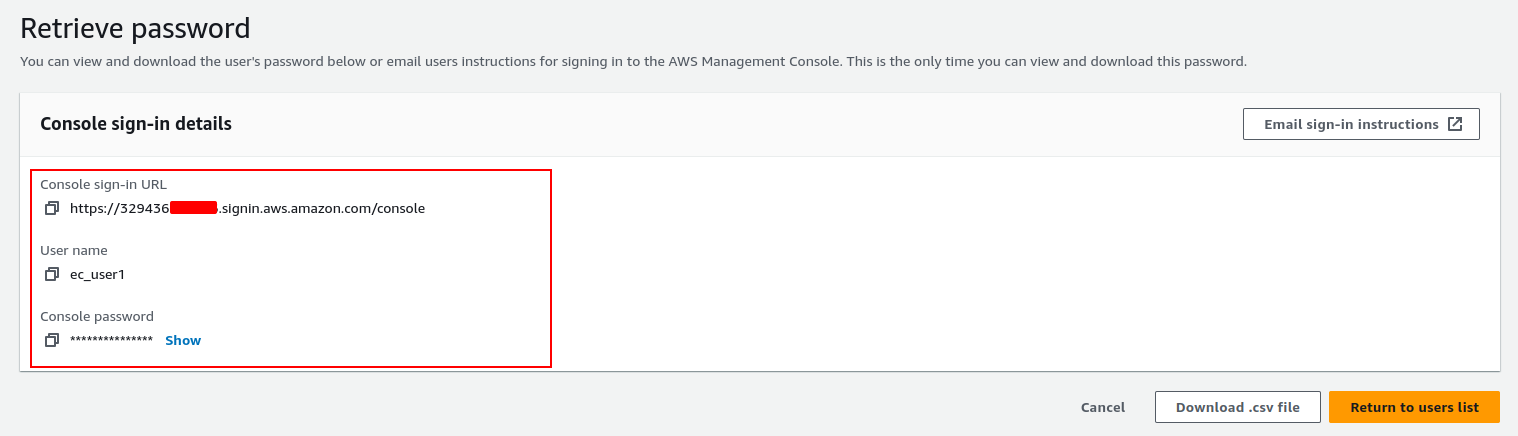
Now open a new incognito tab and navigate to the console URL.
Copy the username and password and paste them into the sign-in page and click “Sign in”.

This will log in to the user, and ask you to add a new password. Set up a new strong password and click “Confirm password change”.

You will be logged in to the AWS user console.

From there you can access the resources defined by the policy chosen.
You can change the policies from the AWS IAM service “User groups” menu. And you can also create a new group there.
Check out more articles on AWS IAM and AWS from Elite Cloud.
Conclusion
AWS provides you with all the tools you need to secure your cloud infrastructure. However, the security of your cloud infrastructure depends on how well you use the tools provided. Use the users, groups, and roles when they are needed with proper policy. And always follow the principle of least privilege when adding a policy.