Google Compute Engine (GCE) is an Infrastructure as a Service (IaaS) model virtual machine service provided by Google Cloud Platform (GCP). It allows users to run virtual machines of different specifications in Google infrastructure, providing flexible and scalable cloud computing. GCE enables you to create, manage, and customize virtual machines (VMs) to run various applications and workloads in the cloud.
Virtual Machines (VMs) Types
Similar to other cloud provider GCP also provides different types of virtual machines that fulfills the need of different business requirements. Google Compute Engine has four types of different instances each designed for a specific purpose.
1. General Purpose
The “General Purpose” machine types in Google Compute Engine are designed to provide a balanced configuration suitable for a wide range of workloads. They offer a good mix of vCPU and memory resources, making them versatile for various applications.
2. Compute Optimized
The “Compute Optimized” machine types in Google Compute Engine are designed for workloads that require a higher level of CPU performance. These machine types are optimized for compute-intensive tasks, making them suitable for applications that demand significant computational power.
3. Memory Optimized
The “Memory Optimized” machine type is great for applications that require a substantial amount of memory. These machine types prioritize memory capacity over computational power, making them well-suited for memory-intensive applications.
4. Accelerator Optimized
The “Accelerator Optimized” machine type is designed to deliver the performance and efficiency for GPU-accelerated workloads such as artificial intelligence (AI), machine learning (ML), and high-performance computing (HPC).
GCE Pricing
The default pricing is on-demand mode that lets you pay for only the resources you use in your vm and for as long as you use it. Other than that GCE also has discount pricing including.
Spot Pricing: This is an option for accessing spare compute capacity at lower costs, with the trade-off of possible instance preemption.
Committed Use Discounts (CUDs): These discounts are available when you commit to a specific amount of usage for a fixed term often 1 year and 3 years. That allows you up to a 70% discount for memory-optimized machine types and up to a 57% discount for all other machine types.
Sustained Use Discounts (SUDs): Sustained Use Discounts (SUDs) in Google Compute Engine (GCE) work like a built-in savings plan, giving you up to 30% off when you keep your virtual machines active for at least 25% of a month without needing any other discounts. It’s like a reward for your ongoing and steady usage, helping you save on your cloud computing costs when you keep things running smoothly.
Getting Started with Google Compute Engine
Look at our article on the Introduction to Google Cloud Platform (GCP) to learn how to create a GCP account.
Creating a Project
The first thing you should know when using GCP is the GCP Project.

Projects in GCP is a special organizational unit that organizes all your GCP resources. This way you can separate resources for each project. And you can also access resources from one project to another project.
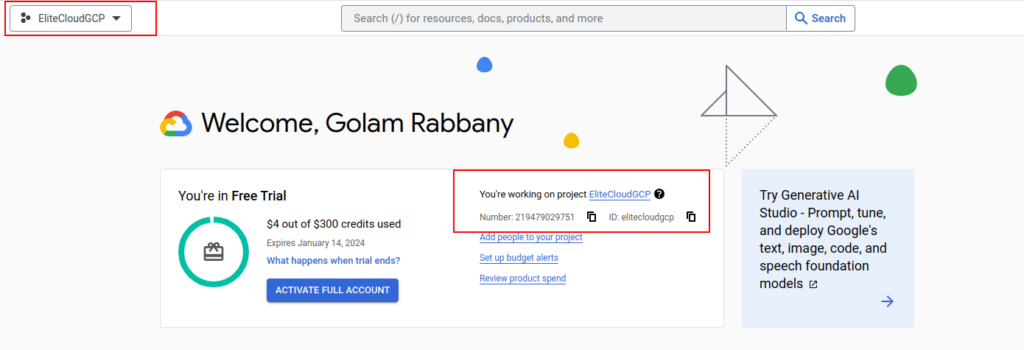
Click on the “My First Project” as marked. There you need to create a new project. You can use the existing project but it’s recommended to create a new project.

It will take you to the setup page. Select a project name and choose the location (optional).

You should remember that you can create limited projects by default (which can be increased with a request). And you can’t edit the project name later, so try to give a proper name.
Once done click Create, this will take some time, and create the project. Next, you have to select the project you created. You can do this by selecting the new project.

Once selected, you will see the project has changed in several places.
Creating Google Compute Engine (GCE) Instance
Now you can create any services and all of them will be created under this project. Let’s create a VM.
From the sidebar menu select “Compute Engine”.
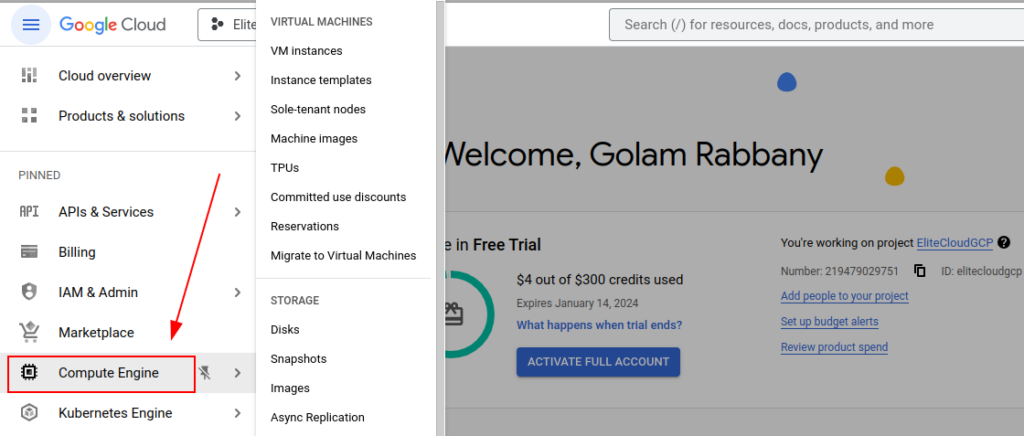
This will ask you to enable the “Compute Engine API”. Just click “ENABLE” and continue.

You will have to enable this API every time you create a new project. This will take a few minutes to get ready.
Once it is enabled, you will be redirected to the Compute Engine home page. You will find the information you need on GCE there. Now click “CREATE INSTANCE”.

This will take you to the instance setup page. Select the name, region, and zone.

In the machine configuration section, you will have to choose the instance family type and instance series. Keep the default if you don’t know what to do.

Next, you have to select the machine type where you choose a specific configuration.

You can click the drop-down menu to see all the available options. Let’s keep everything default as this will be enough for the demo.

The “ADVANCED CONFIGURATIONS” option lets you select how much you will use those resources. For now, let’s skip this.
Next, you need to select the VM provisioning model. It’s recommended to use the standard unless your application is fault-tolerant and you know what you’re doing.

The “Display device” option lets you use screen-capturing tools. Let’s skip this as this won’t be of any use to us.

Skip the “Confidential VM service”. The “Container” option lets you deploy a container from the get-going.
Next, you see the “Boot disk” that lets you select the disk type and size. You can keep it default or click on the “CHANGE” button to configure it to your choice.

It also lets you select the operating system, snapshot options, and also add existing disks.

Keep everything default. Also, keep the “Identity and API access” action default. You can click on the side “?” mark to see a small overview of what each option does.
In the “Firewall” section you can allow HTTP/S and load balancer traffic. This setting can be changed later. Because Google uses a browser-based SSH you don’t get to see the “SSH” here.

There are two more sections. But you can skip them and click “CREATE”. But before you do, you will be able to see the monthly estimate for the VM configuration you’ve chosen.

GCP provides simple and transparent pricing. You can also click on the “Compute Engine pricing” link to get detailed info.
Once you hit “CREATE” it will take some time to create the VM.
GCE Instance Overview

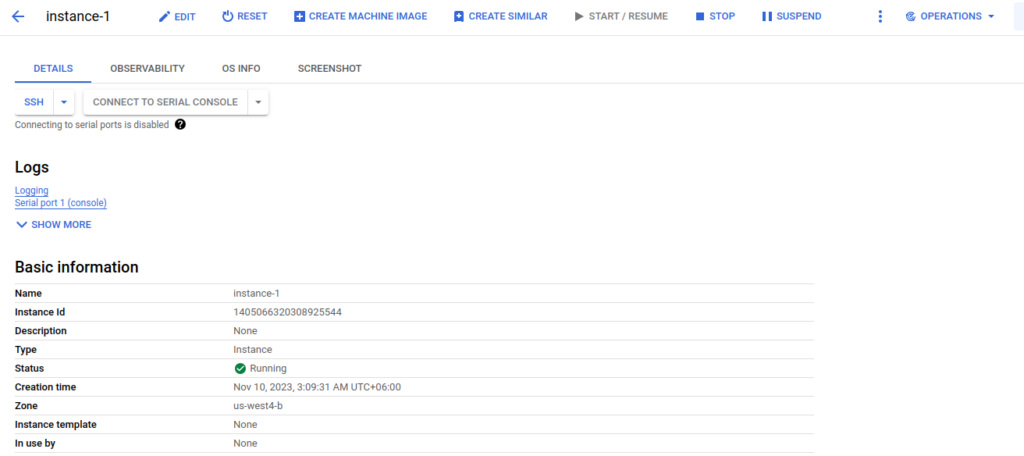
Clicking the instance name will take you inside the instance. There you will see basic information, quick action button (reset, stop, etc), machine configuration, networking, firewalls, and almost all the information that you will need to know for that instance.
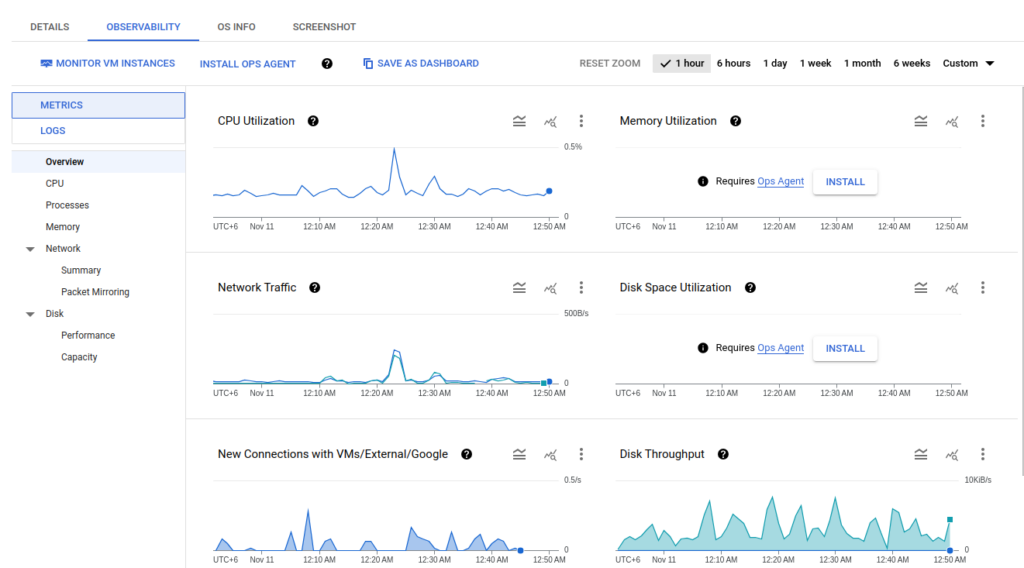
The “Observability” tab holds matrics data and shows real-time states of your VM’s CPU, memory, traffic, and disks.
Connecting to GCE
To connect to the VM, you need to get to the “Details” tab and click on the “SSH” button.

This uses the default browser-based authentication that verifies your Google account and lets you in. This will ask for an Authorization you need to click “Authorize” for that.

Then it will redirect you to your Google account verification (the process will be automatic if you’ve account logged in) and give you browser-based access.

Operating System images that are created for the cloud are extremely optimized. As a Debian server out of the box is just taking 125 MB of RAM.

You can use all the command line shortcuts directly from your browser. Aside from that you also get to see some additional benefits of using ssh in the browser.
File Transfer in Google Compute Engine (GCE)
You can upload and download files directly from your SSH using your browser.

Clicking the upload button will pop up a window letting you choose the file you want to upload.

Once you select the file the “Upload Files” button will become clickable.

Instead of directly uploading the file Google verifies your Google account and then uploads the file. This prevents unauthorized file uploads to your VM. You will be able to see the progress of the upload at the bottom left corner.

The uploaded files will be found in the user’s home directory.

For downloading a file you need to give an absolute path of your file.

If the given path is correct this will download the file to your system.
Installing Web Server
Let’s install a web server and access it from our host machine. Use the command “sudo apt install apache2” to install apache2 (an open-source web server).

Then apply the command “sudo systemctl enable –now apache2” to enable and start apache2.

Now navigate to your GCE dashboard and click on the “External IP”.

If you see any error, manually type the IP. This is because clicking on the link takes you to the https protocol which is port 443, but out of the box apache runs on http (port 80).

Once you are done just type “exit” in the web-ssh shell to exit out.
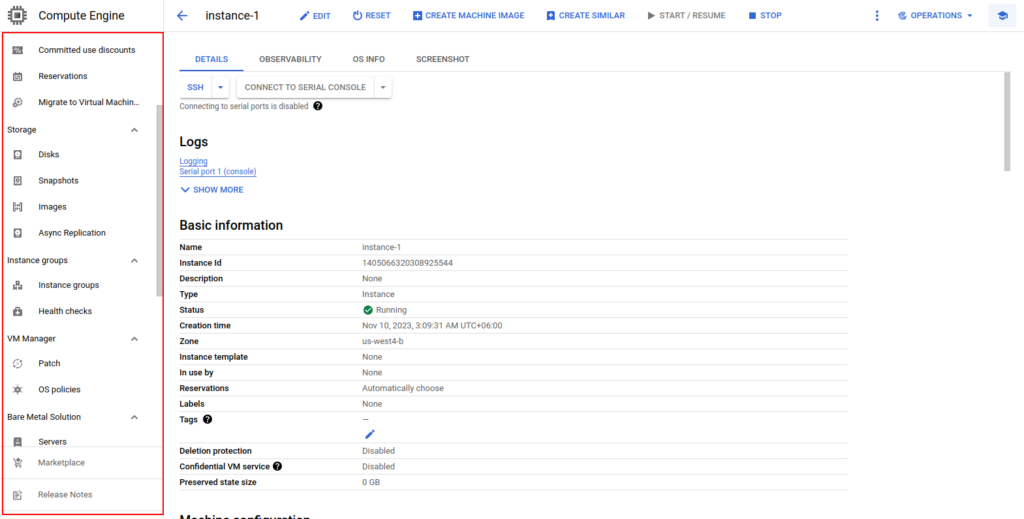
You will find every other utility for your GCE in the sidebar menu. You can add new disks, take snapshots, and more.
When you are done with your instance testing it’s recommended to stop the instance unless you are running a production application. As soon as you stop the vm instance your billing will stop. But this excludes the monthly bill like storage.

GCE can be set up in a number of ways, including vm from scratch (shown method), vm from an existing template, vm from a machine image, and a ready-to-go solution from the GCP marketplace.
Conclusion
Google Compute Engine is a powerful and versatile solution for your virtual machine needs. It offers machines for every type of business, with a flexible pricing model, and lots of advanced features to properly deploy and manage your vm instance.

